Tuesday, December 24, 2013

Hands - Redux

I decided to have another go at the hands for my model. I had planned to make gloves for my original hands but found that I lack the sewing skills to do so. This time around I decided to cast the hands in rubber over an animation wire frame. The rubber should be flexible enough to allow movement yet rigid enough to keep it's form.

I started by building a model of a hand out of clay.


I used a simple wire frame to start,


then built up the hand using the clay. Once the clay dried, I cleaned up the shape a bit with sand paper and smoothed out the surface.


The next step is to make a mold of the hand. I used Sculpey brand clay for the mold because it is a little flexible after it cures. This comes in handy when putting the two sides of the mold together. Also, Sculpey cures in about 15 minutes in the oven so you don't have to wait overnight for it to dry. I baked the bottom side of the mold first.


After the bottom side cooled, I put the model hand back into the finished mold and formed the top over it. You must be very careful not overlap the top side and the bottom side. You want them to be flush, but they need to come apart in the end.


I baked both the top, bottom and the hand together in the oven. This way I could be sure the top will hold it's shape while curing. After the mold cooled I pulled it apart, and set aside the model hand.


Next I needed to add a release agent to the mold so the rubber would not stick. I like vaseline because it does not pool at the bottom of the mold once applied. I covered every surface where the rubber would come in contact with the mold with vaseline. The next step was to build a wire armature. I used animation wire to form a hand shape that was slightly smaller than the mold. 


I used duct tape to secure the two sides of the mold.


The seam around the edge of the mold must be sealed. I wrapped the entire mold in tape, then used a clamp to set it upright. I did not put much pressure on the clamp because it was in danger of breaking the mold.


The rubber I used for the hands is called Poly PT Flex 60. It is a two part system, you mix 1 part a with 1 part b and pour into your mold. Very simple.


Once set, the color of the Poly PT Flex 60 is kind of a transparent amber, which is not the color I wanted. I added pigment to part a of the mix to change the color to black. You can buy pigment for liquid rubber but it is kind of expensive so I used oil paint. There are a number of dyes you can use to change the color of the rubber as long as they don't contain any water. The chemicals in the liquid rubber convert the water into carbon dioxide creating thousands of tiny bubbles, which will ruin your day. The rubber turns into a very slow, but unstoppable, volcano.


After adding part b, I mixed the two parts thoroughly, and poured the mix into the mold. I used an alligator clip to suspend the animation wire in the rubber mixture.


I let the rubber cure for about an hour before removing the tape and slowly pulling apart the mold. 


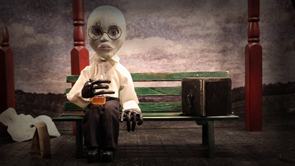
One freaky alien hand done, one to go.

Tuesday, November 26, 2013

Flattening the ends of Dowels

I was working in my garage the other day when I ran into trouble. I wanted to make the end of a dowel I had just cut flat with a detail sander, but I could not do it. I kept getting a slight angle, and every time I tried to fix the angle, I would get one the other way. So I stepped back for a minute and came up with this jig.


The holes I drilled are the exact size as the dowels I need sanded.


I pounded the dowel into the jig...


and sanded it down to the face of the jig.


Now the dowel is perfectly flat at the end is sanded smooth.


Thursday, November 14, 2013

Tie Downs

Stop motion animation can be very tricky business. One of the first things you learn is that if a stationary object moves unintentionally, it is almost impossible to get it back to it's original position. There have been many times where I have had to reshoot a scene because I carelessly bumped a prop and could not reposition it. For this reason everything, and I mean everything, needs to be tied down or affixed to the set in some way.

There are several different options when considering tie down systems. There are straps, magnets, nuts & bolts, screws, glue, putty, specially designed rigs or even the objects weight can be enough to hold it down. I use a combination of all of them depending on the object itself.


Here is an example of a wing nut and bolt being used to tie down a tree prop. Make sure to use washers so you don't damage the the prop or stage when tightening the bolt.


This prop was made of paper so I couldn't bolt it down directly. I took a little piece of foam and put a bolt through that so it wouldn't rip the paper. I then used a wing nut to affix it to the stage.


This box had writing on the bottom so I couldn't just put a bolt there. I ended up taking a threaded rod, putting a 90 degree bend in it, and attaching it to the back of the box. In the photo above, I attached it to a park bench using a large washer and a wing nut.


I had previously put nuts in the bottom of the shoes of the main character. This allowed me to use threaded rods to hold down the feet. The rods are bent at the end to make it easier to screw them in. Because these rods will be moved multiple times, I am using plastic washers to limit the damage to the stage.


I use blu-tac putty to secure anything that can't be screwed down. I like blue color because it can be removed quite easily in post. The bottle in the photo below it affixed to the hand using blu-tac.


I used wood screws to secure the bench and the pillars. The white mask in the background is using it's own gravity to stay in place. It is made of plaster of paris and is actually very heavy. The backdrop is being held up by magnets so it can be changed out in a hurry.

Saturday, November 9, 2013

Sequel Part II

I have uploaded my new animation today, it's about a man and his box. You can find in under the Animations tab on top or follow the link.


Thanks for watching!

Tuesday, November 5, 2013

Simple Green Screen Butterfly

I made this animated butterfly for an upcoming project. I decided to build a larger model than what would appear on screen, shoot it in front of a green screen, and shrink it down in post. I thought this process would be easier than building a tiny model and trying to animate it on set. Also, this model needed to be suspended in mid air with wires and removing wires on a green screen is relatively easy to do. Although the process looks somewhat difficult, with the right software it is actually very simple.


I started with my model suspended on a wire. I have already removed the wire so it is not visible in this example. I animated the butterfly and brought the completed frames into After Effects.


In After Effects, I shrunk the butterfly down to about 5% percent of it's original size. I then animated the flight path simply by changing the butterflies position and adding keyframes along the timeline. You can change the curve of the path by dragging the bezier handles at the beginning and end of the path.


I removed the green screen with the Keylight 1.2 effect in After Effects. It is one of the easiest plugins to use. All you need to do is choose the color you would like to remove by selecting the eye dropper next to the "Screen Colour" swatch and choose the color you would like to remove from within your animation. There are several adjustment tools to play with to get the exact look you want.


I then added the background and changed the color from purple to yellow using the Photo Filter effect. I also adding a glow to enhance the light reflecting off of the wings.

Here is a video of the different stages of development.


Monday, October 21, 2013

Clothes - Part 3 - Accessories

Buttons. To prove that I am actually a man, I used nails for the buttons. I went out and got the smallest nails I could find at the hardware store, which was 1/2". They ended up being a little longer than I wanted, but I was able to fix them in the end. I started by painting them white.


After the paint had dried I cut the nails down to about 1/4" (maybe a little smaller) with my Dremel.


I had to reshape the ends to a point so they could be pounded into wood. Again, I used the Dremel and carefully cut a point at the end of each nail.


I realized about half way through painting that the paint was going to come off of the nails as soon as I started pounding them into his chest with a hammer. Fortunately, It did not turn out that bad. In fact, I kind of like the way it looked so I left it.

Belt. This was relatively easy in comparison to the buttons. I started out wit a piece of pleather cut from an old purse. Using an Exacto knife, I cut out a strip about 1/4" wide and just long enough to go around the waist of my model.


I rounded the end with a pair of scissors.


To make the buckle, I started with a paper clip that I had previously dipped in acid to remove the shiny outer coating and cut it in half.


I folded one side in and trimmed off the excess.


I then glued the buckle in place with super glue


I put double stick tape on the inside of the belt to help it stay in place.


I cut the head off of a straight pin and stuck in at an angle to make the prong. I added a little more double stick tape to the end of the belt to hold everything in place.


You may have noticed that there was a stain on his shirt next to the buttons. I had some grease on my hands when I was pounding in the nails and got some on his shirt. I found that you can take out stains like that with Bissel carpet cleaning solution. I mixed 1 part Bissel with 2 parts water and put it on the end of a cotton swab and GENTLY rubbed out the stain. I added water to the other end of the swab to rinse it out.


He totally has a belt made out of a purse.

Up next... Animation.

Monday, October 14, 2013

Clothes - Part 2 - Shirt

Shirt. I found this pattern at undeadthreads.com. It is actually for a trench coat but I modified it to be a dress shirt. It was very easy, I cut the length in half to accommodate my model, shortened the sleeves a bit and omitted the flaps in the front. Because this pattern was made for a doll, I did not need to resize it in Photoshop. Instead I just cut away what I did not need after printing.


I pinned the pattern to my material. I used an old pillow case for this one.


I started with the vest.


I hemmed the bottom and the front. The seam on the front was curved for the extra flap on the trench coat so I sewed it straight to make it a dress shirt.


I attached the front and back together at the shoulders.


I then attached the arms to the vest.


To make the collar I started by drawing a straight line for the seam on the pattern.


I sewed up the sides and trimmed away the excess fabric to make it easier to turn inside out.


Tada! I actually had to make the collar twice. The first one I made was too short for the neck hole. But that happens to me a lot.


I then folded the cuffs in half a sewed them together.


I attached the cuffs to the end of the sleeves. Before I put the collar on, I noticed that the shirt was a little bigger than I wanted. I decided to take about 1/2 inch out of the back of the shirt. I did this by folding the back in half and sewing a straight line from the bottom to the top. I then cut off the excess material. Then I could attach collar to the neck. 


Finally, I ironed the collar down and sewed up the sides and the sleeves. I folded the top front directly underneath the collar at a slight angle. I did not think I could sew this piece so I used a bit of Stitch Witchery to hold it down.


I will need to add buttons to the front at a later date.

Contemplating his next move. 

It is at this point that I began to have nightmares of this model coming to life and trying to kill me. I guess that means it's working.

Up next... accessories, and buttons probably.